The “Properties” window lets you see and edit the properties that apply to the selected element. This window consists up to six different tabs. All six tabs are not always present. The visibility of the single tabs depends on the widget type. Most widgets have a “Common” tab and a “Code” tab. The combination of presented tabs depends on the widget type.
For example:
wxFramewidgets have “Common”, “Widget” and “Code” tabsSpacers have the tabs “Layout” and “Code”
wxGridSizerwidgets have “Common” and “Grid”wxBoxSizerwidgets only have the “Common” tab
Editing properties is quite simple; Properties are represented by buttons, text boxes, checks and other controls. Usually they are referenced by the same name or symbol that you find writing C++ code.
Usually you get the changes in the design window in real time. In
some cases you have to push the
“” button. For example, the
wxNotebook widget shows in its
“Properties” window a list of child
wxPanels. You have to press the
“” button to show changes you
make when you add or remove panels.
You can show or hide the “Properties” window by the menu item → .
The page “Application” contains the general settings of the active wxGlade project.
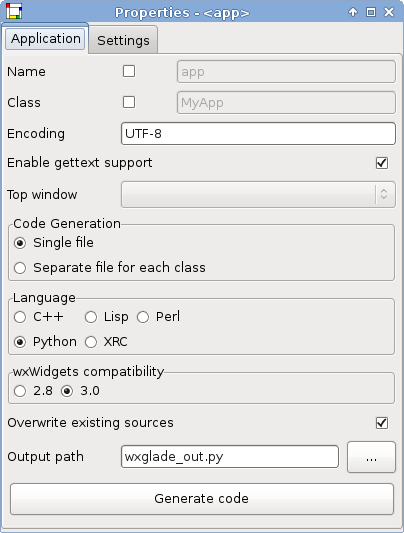
- “Name”
Name of the instance created from “Class”
the section called “Automatically Created
wxAppInstances” provides more information- “Class”
Name of the automatically generated class derived from
wxAppthe section called “Automatically Created
wxAppInstances” provides more information- “Encoding”
Encoding of the generated source files.
The encoding to use with new projects will be determined automatically based on the machine settings. “UTF-8” will be used if the automatic detection fails.
- “Enable gettext support”
Enable internationalisation and localisation for the generated source files
the section called “Automatically Created
wxAppInstances” provides more information- “Top window”
This widget is used as top window in the
wxAppstart codethe section called “Automatically Created
wxAppInstances” provides more information- “Code Generation”
Write all source code in one file or split the source into one file per class / widget
the section called “Using the Source Code” provides more information
- “Language”
Programming language to generate the source files in
- “wxWidgets compatibility”
Generate source files for the selected wxWidgets version
- “Overwrite existing sources”
Overwrite existing source files or modify the code sequences generated by wxGlade in place
the section called “Using the Source Code” provides more information
Warning
This feature is deprecated and will be removed from a future version of wxGlade. Thereby it's advised not to use this feature for new projects. Details about all deprecated features are shown in the section called “Deprecated Features”.
- “Output path”
Output file or directory
the section called “Output Path and Filenames” provides more information
- “Generate code”
Start generating source files
The page “Settings” contains the language specific settings of the active wxGlade project.
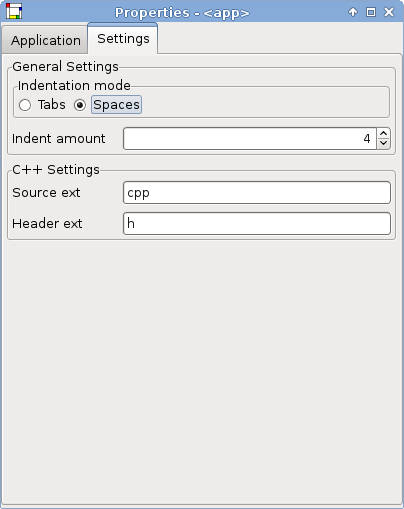
- “Indentation mode”
Use spaces or tabs for indentation within the generated source files.
- “Indentation amount”
Number of spaces or tabs used for one indentation level.
- “Source ext”
Extension of the source file.
The extension doesn't has a leading dot.
- “Header ext”
Extension of the header file.
The extension doesn't has a leading dot.
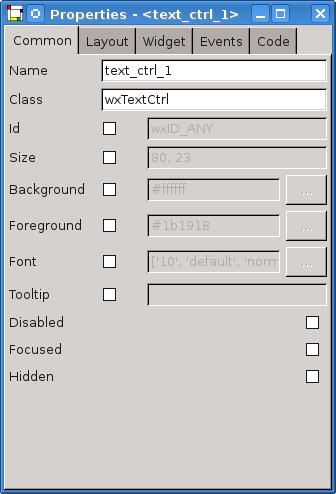
The first tab contains the common properties that apply to all widgets. As shown in Figure 5.8, “Common Properties” the common properties are related to name, class, size, colors, fonts and tooltip.
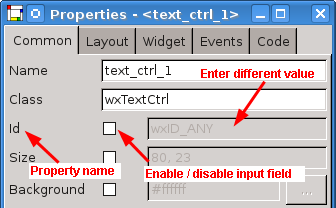
The property name is a mangled version of the wxWidgets property name. The property input field is disabled by default. wxGlade won't use disabled properties for code generation. wxWidgets defaults are used instead.
Enable the property in the wxGlade GUI to set non-default values (see Figure 5.9, “Changing Common Properties”).
- “Name”
Name of the instance created from “Class”
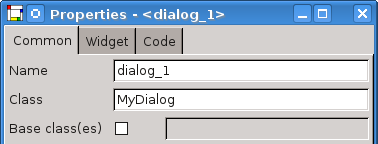
- “Class”
Name of the subclass of the widget. How this name affects code generation depends on the output language.
Example 5.1. Generated Python code of a subclassed widget
class MyDialog(wxDialog): def __init__(self, *args, **kwds): kwds["style"] = wxDEFAULT_DIALOG_STYLE wxDialog.__init__(self, *args, **kwds)- “Base class(es)”
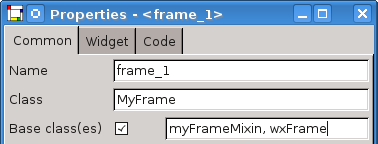
A comma-separated list of custom base classes. The first class will be invoked with the same parameters as this class, while for the others the default constructor will be used. This property will be shown only for non-managed widgets for instance
wxFrame,wxDialog,wxNotebook,wxPanelandwxSplitterWindow. You should probably not use this if “Overwrite existing sources” is not set.Example 5.2. Generated Python code of a widget with two base classes
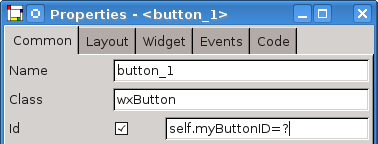
class MyFrame(myFrameMixin, wxFrame): def __init__(self, *args, **kwds): kwds["style"] = wx.DEFAULT_FRAME_STYLE myFrameMixin.__init__(self, *args, **kwds) wxFrame.__init__(self)- “Id”
This property could be
a constant numeric value
a predefined identifier e.g.
wxID_ANYa predefined variable like a class member e.g. self.myButtonID
a variable assignment e.g. “self.myButtonID=?” The pattern of a variable assignment is always “variable=value”. The value could be again a numeric value, a predefined identifier, another predefined variable or “?” a shortcut for “wxNewId()”
Example 5.3. Generated Python code for a variable assignment
class MyFrame(wx.Frame): def __init__(self, *args, **kwds): # begin wxGlade: MyFrame.__init__ kwds["style"] = wx.DEFAULT_FRAME_STYLE wx.Frame.__init__(self, *args, **kwds) self.myButtonID = wx.NewId() self.button_1 = wx.Button(self, self.myButtonID, "button_1") self.__set_properties() self.__do_layout() # end wxGlade- “Size”
Set the widget size in pixels.
- “Background”
Set the background colour of the widget.
- “Foreground”
Set the foreground colour of the widget.
- “Font”
Set the font for widgets text elements.
- “Tooltip”
Set a tooltip for this widget.
- “Disabled”
Disable the widget.
- “Focused”
Set the widget to receive keyboard input.
- “Hidden”
Hide the widget.
The second tab is related to layout properties that control position and resizing within the sizer.

These properties apply to any widget. You can check or
uncheck any option related to the placement in the sizer. Many widgets
may have a default value of 3 in the
“Border” property in the Preferences
Dialog (see the section called “Preferences Dialog”). If you let a
widget have a default border, the wxAll option is
also checked.
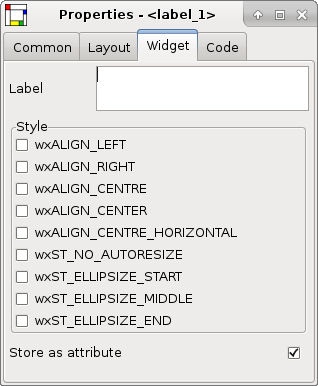
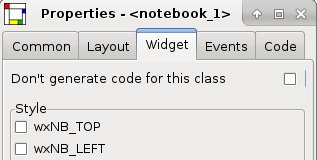
The third tab, named “Widget” is different for each widget, and lets you edit properties for the specific element you have selected.
The set of options may also be quite complex in the case of
widgets that have a great deal of methods and properties (such as
grids and tree views). In this case, wxGlade greatly simplifies the
process of designing forms.
“Store as attribute” stores the widget as an attribute of the top-level class.
Select “Don't generate code for this
class” to prevent generating code for subwidgets of
wxNotebook, wxPanel and
wxSplitterWindow.
You can use this feature to:
Split complex designs into smaller pieces. The correlation in such a setup based on the widget name.
Prevent generation of stubs, if using custom base classes.
Some widgets have an “” button onhe “Widget” tabs. Click on the “” button to consolidate your changes. Otherwise they will lost.
The most of the styles as shown in the the section called “Layout Properties” and the section called “Properties Window” have a tooltip with additional information about the style.
The tooltips show a short description as well as additional information.
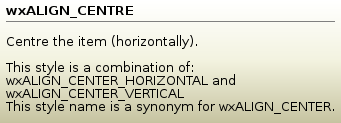
The style details will be used also to compute the styles in the generated source code.
The fourth tab, named “Events” lists the widgets events. wxGlade generates an event handler stub and binds the event for each added handler name.
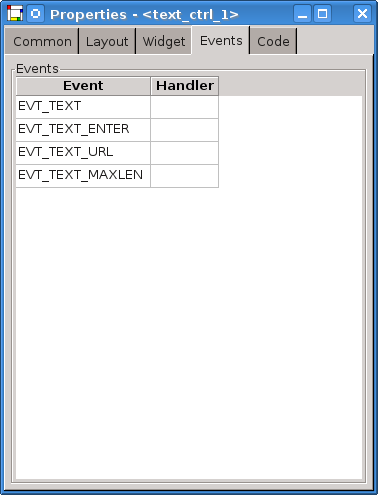

Example 5.4. Generated Python code of an EVT_TEXT event handler stub at line 12
class MyFrame(wx.Frame):

    def __init__(self, *args, **kwds):
        # begin wxGlade: MyFrame.__init__
        kwds["style"] = wx.DEFAULT_FRAME_STYLE
        wx.Frame.__init__(self, *args, **kwds)
        self.text_ctrl_1 = wx.TextCtrl(self, -1, "")
        self.__set_properties()
        self.__do_layout()
        self.Bind(wx.EVT_TEXT, self.myEVTTEXT, self.text_ctrl_1)
        # end wxGlade

    def myEVTTEXT(self, event):  # wxGlade: MyFrame.<event_handler>
        print "Event handler `myEVTTEXT' not implemented!"
        event.Skip()
The fifth and last tab is named “Code” and has two parts.
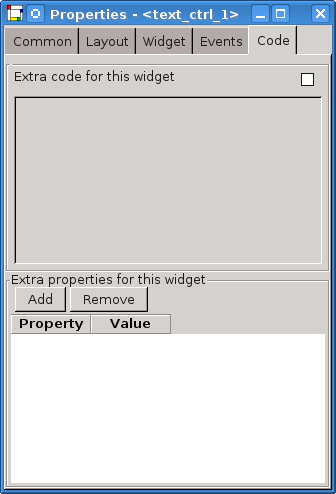
wxGlade never declares or assigns variable or function names or import for non-default base classes and custom widgets.
If you use non-default base classes, var: or
code: statements, you have to manually assign the
variables, declare used functions as well as to include resp. to
import of additional code need by your widget in
“Extra code for this widget”. This
“Extra code” will be added to the
context of the source file and not to the context of the class.
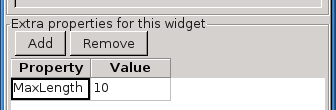
The lower part simplifies setting of additional widget properties. Add the property name to the “Property” field and not the name of the setter function. For instance add “MaxLength” and not “SetMaxLength”. The “Value” field is just a text field. You can enter e.g. a simple number only as well as a complex statement e.g. 0, 0, "1" or a function call. But be carefully! Your entered sequence will be inserted in the source without any changes - one to one.
Note
“Extra code” and “Extra properties” won't be processed for the widget preview.
Example 5.5. Generated Python code for setting property MaxLength to 10 at line 14
class MyFrame(wx.Frame):

    def __init__(self, *args, **kwds):
        # begin wxGlade: MyFrame.__init__
        kwds["style"] = wx.DEFAULT_FRAME_STYLE
        wx.Frame.__init__(self, *args, **kwds)
        self.text_ctrl_1 = wx.TextCtrl(self, -1, "")
        self.__set_properties()
        self.__do_layout()
        # end wxGlade

    def __set_properties(self):
        # begin wxGlade: MyFrame.__set_properties
        self.SetTitle("frame_1")
        self.text_ctrl_1.SetMaxLength(10)
        # end wxGlade