wxGlade helps you to design the menu, the tool bar and the status bar for your application.
There are two ways to integrate the three elements into a wxGlade project:
Create standalone widgets by clicking the corresponding button in the main window.
Associated with a
wxFrameby selecting the related checkboxes in thewxFrameproperties window.
Associated bars will be integrated automatically to the right place. On the other side standalone widgets have to integrate the elements later manually in design after the source code has been generated.
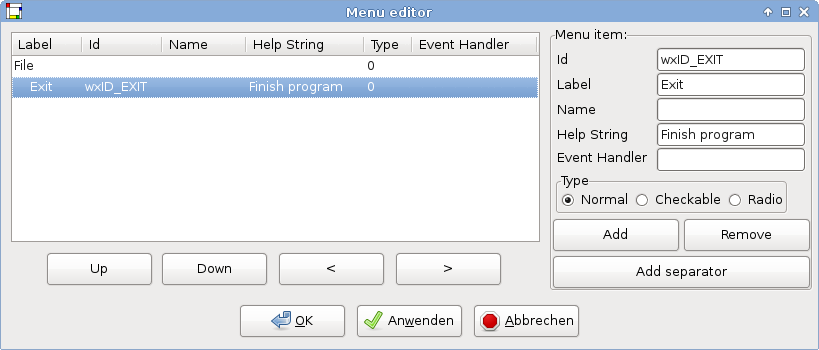
In the menu “Properties” window click on the “” button. A dialog will let you edit your menu. Use the “” button to add items to the menu; enter the label, an optional name and help string. You can use numbers or variable names as the item id. If you use a variable name, you have to provide extra code in the generated source code.
Choose the type of the item: Normal, Checkable or Radio.
You can move menu items with “” and “” buttons, and you can modify the hierarchy of the menu with “” and “” buttons.
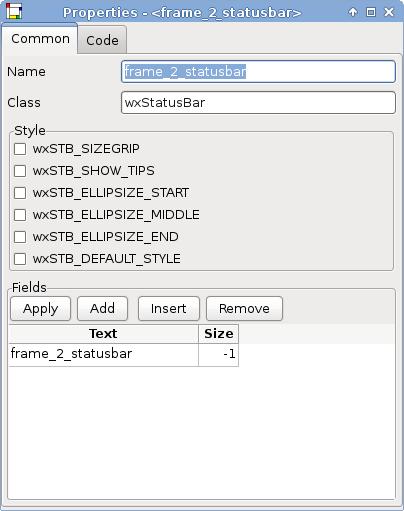
In the “Properties” window you can edit the list of fields and their size.
You can edit the toolbar style and bitmap size in the properties window.
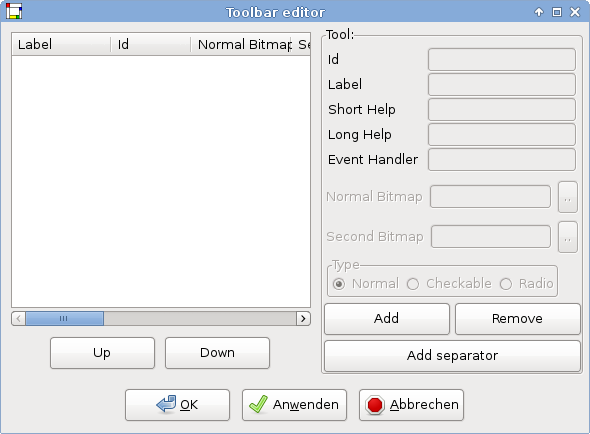
Click on the “Edit tools...” button to edit the toolbar buttons. Use the “Add” button to add buttons to the toolbar; enter the label, an optional name and help string. You can use numbers or variable names as the button id. If you use a variable name, you have to provide extra code in the generated source code.
Choose the type of the button: Normal, Checkable or Radio.
You can move toolbar buttons with “” and “” buttons.
You have to enter two bitmaps, one for normal status and the other for the pushed status.
Refer to the section called “Specifying the Path of Bitmaps” for bitmap path specifications.