wxGlade is available in four different package types:
the sources packages (
.zipand.tar.gz)the full installer on Microsoft Windows (
wxGlade-<VERSION>-setup.exe)the installer of the Standalone Edition on Microsoft Windows (
wxGlade-SAE-<VERSION>-setup.exe)current development version
You need listed additional packages for building wxGlade packages from the Mercurial repository:
setuptools
All stable version are available for downloading at https://sourceforge.net/projects/wxglade/.
wxGlade manages source code in a Mercurial repository hosted on Bitbucket.org. You can fetch the whole repository from https://bitbucket.org/agriggio/wxglade using anonymous Mercurial (hg) access.
Alternatively you can download different source tarballs from https://bitbucket.org/agriggio/wxglade/downloads.
The full installer requires a local installation Python and wxPython. The wxWidgets are usually bundled with wxPython on Microsoft Windows. Thereby you don't need to install wxWidgets separately.
The Standalone Edition doesn't need additional packages. It's includes already the required parts of Python, wxPython and wxWidgets.
The installation process is quite simple. Just download the installer binary, execute it and follow the instructions.
Current Linux distributions provide wxGlade packages already. Use the distribution specific install mechanism to install the wxGlade package and all dependencies.
Install wxGlade from the source package like described in the section called “Installing from Source” if your distribution doesn't provide any package or the package is out-of-date.
On Unix systems wxGlade will be started using the shell script wxglade. The script search the system for Python 2 and finally executes the Python interpreter to start wxGlade.
You can set the environment variable PYTHON_BIN,
if the shell script wxglade doesn't find Python or
if you want to use a non-default interpreter.
The installation from scratch requires Python, wxPython and wxWidgets. Install these three components first. You can use already packaged versions of those components for your operating system. Otherwise read the installation documentation of the missing components and follow the instructions.
Download a source package or a development package in a first step.
You can install wxGlade from source in three different ways.
The “Single User Installation” is a simplified
installation without using native package like
.msi or .exe files on
Microsoft Windows or .rpm,
.pkg and .deb on Linux.
It's to provide a simple way for running wxGlade without the need of
installation privileges.
The dependencies listed in the section called “Requirements and Supported Platforms” have been satisfied.
The source packages and the development packages have the same structure. They have a top-level directory and all wxGlade files are under those top-level directory. Extract the package into the user's home directory. Take care that the directory structure of the archive will be preserved. Rename the top-level directory to wxGlade. That's shorter and simpler to use.
Change into the new created directory. Execute the wxglade file on Unix operating systems or wxglade.pyw on Microsoft Windows to start wxGlade. Feel free to create a shortcut on your desktop.
That's all. Installations below users home directory don't require administrative permissions.
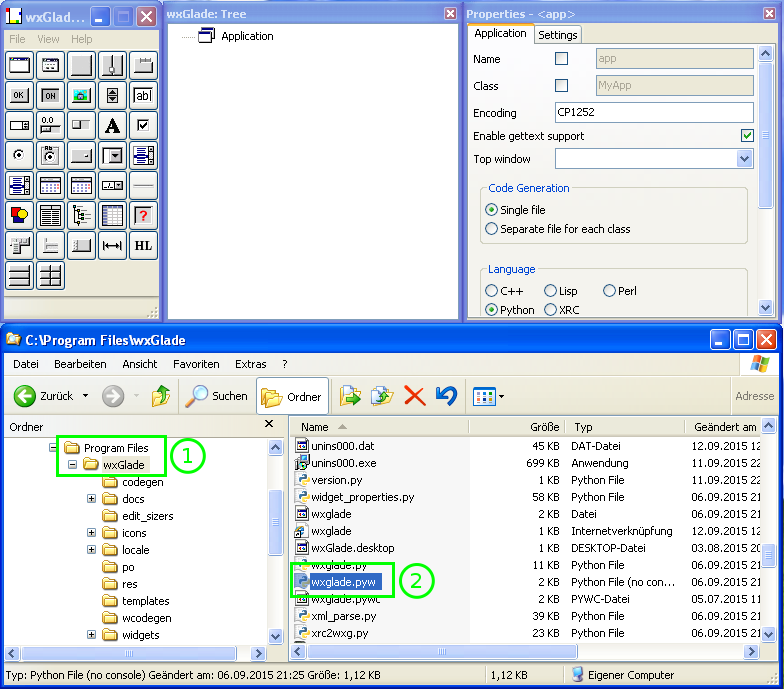
The first variant of a multi user installation is very similar to the section called “Single User Installation (Extract and Run)” except the installation directory. And probably you need administrative permissions. You could extract the wxGlade source package e.g. into C:\Program Files\wxGlade on Microsoft Windows or into /opt/wxGlade on Unix. Execute the wxglade file on Unix operating systems or wxglade.pyw on Microsoft Windows to start wxGlade.
The second installation method is only supported Unix operating systems.
Extract the downloaded package into a temporary directory. Open a terminal window, change into the temporary directory and install wxGlade using execute the Python setup script setup.py as follow:
python2 setup.py install --root <DESTINATION DIRECTORY>
Note
Parameters shown in angle brackets (e.g.,
“<parameter>”) are
required.
Parameters shown in square brackets (e.g.,
“[parameter]”) are optional.
If not given, wxGlade will use suitable defaults.
Example 2.1. Installing wxGlade at /opt/wxglade
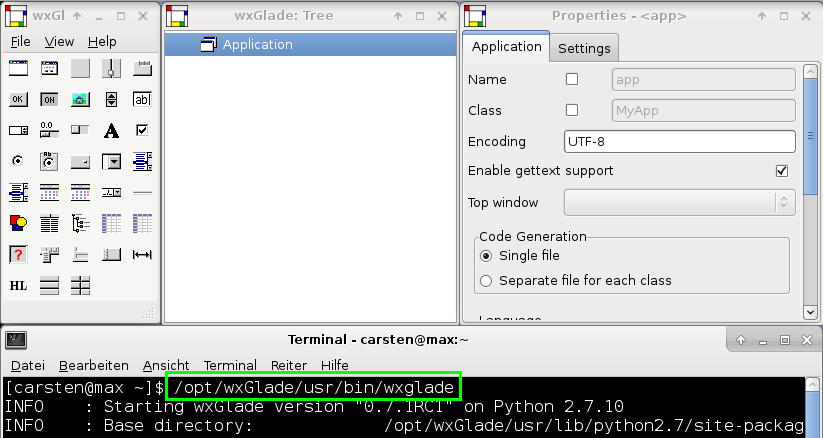
# python2 setup.py install --root /opt/wxGlade
running install
running build
running build_py
running build_scripts
running install_lib
creating /opt/wxGlade
creating /opt/wxGlade/usr
creating /opt/wxGlade/usr/lib
creating /opt/wxGlade/usr/lib/python2.7
[...]
writing manifest file 'wxGlade.egg-info/SOURCES.txt'
Copying wxGlade.egg-info to /opt/wxGlade/usr/lib/python2.7/site-packages/wxGlade-0.7.1rc1-py2.7.egg-info
running install_scripts
creating /opt/wxGlade/usr/bin
copying build/scripts-2.7/wxglade -> /opt/wxGlade/usr/bin
changing mode of /opt/wxGlade/usr/bin/wxglade to 755
Once the installation has finished the wxGlade main script wxglade is located at <install directory>/usr/bin.
Execute the script <install directory>/usr/bin/wxglade to start wxGlade